| 일 | 월 | 화 | 수 | 목 | 금 | 토 |
|---|---|---|---|---|---|---|
| 1 | 2 | 3 | ||||
| 4 | 5 | 6 | 7 | 8 | 9 | 10 |
| 11 | 12 | 13 | 14 | 15 | 16 | 17 |
| 18 | 19 | 20 | 21 | 22 | 23 | 24 |
| 25 | 26 | 27 | 28 | 29 | 30 | 31 |
- GIT
- Express
- Python
- Sequelize
- jest
- MongoDB
- AWS
- OCR
- typeORM
- 공룡게임
- class
- dfs
- flask
- 자료구조
- react
- game
- 게임
- nestjs
- mongoose
- Queue
- Bull
- JavaScript
- Nest.js
- Dinosaur
- nodejs
- MySQL
- 정렬
- TypeScript
- cookie
- Today
- Total
포시코딩
OpenCV.js - CV(Computer Vision) 오픈 소스 라이브러리 본문
개요
Computer Vision 오픈 소스 라이브러리인 OpenCV.js를 통해
이미지 흑백처리, 이진화 등의 전처리 작업을 진행할 수 있다.
https://docs.opencv.org/3.4/d5/d10/tutorial_js_root.html
OpenCV: OpenCV.js Tutorials
Core Operations In this section you will learn some basic operations on image, some mathematical tools and some data structures etc.
docs.opencv.org
세팅
https://docs.opencv.org/3.4/d0/d84/tutorial_js_usage.html
위 링크에 들어가면 opencv.js 파일 안내가 나오는데

클릭 후 우클릭 -> 다른이름으로 저장을 통해 js 파일로 받을 수 있다.
<!DOCTYPE html>
<html lang="en">
<head>
  <meta charset="UTF-8">
  <meta name="viewport" content="width=device-width, initial-scale=1.0">
  <title>Document</title>
</head>
<body>

  <script async src="./js/opencv.js" type="text/javascript"></script>
  <script>
    var Module = {
      onRuntimeInitialized() {
        console.log('OpenCV.js is ready.');
      }
    };
  </script>
</body>
</html>
이후 js폴더 내에 opencv.js로 저장했다면 위와같이 세팅하면 끝
사용 방법
사용 방법은 너무 많은데 그 중 회색처리랑 이진화에 대해서만 알아보자
Grayscale
https://docs.opencv.org/3.4/df/d24/tutorial_js_image_display.html
OpenCV: Getting Started with Images
Goals Learn how to read an image and how to display it in a web. Read an image OpenCV.js saves images as cv.Mat type. We use HTML canvas element to transfer cv.Mat to the web or in reverse. The ImageData interface can represent or set the underlying pixel
docs.opencv.org
하단 예시를 통해 회색 처리 하는 코드를 확인할 수 있고 직접 체험해볼 수 있다.
코드
<!DOCTYPE html>
<html lang="en">
<head>
  <meta charset="UTF-8">
  <meta name="viewport" content="width=device-width, initial-scale=1.0">
  <title>Document</title>
</head>
<body>
  <img src="./sample.png">
  <button onclick="handleClick()">변환</button>
  <canvas></canvas>

  <script async src="./js/opencv.js" type="text/javascript"></script>
  <script>
    var Module = {
      onRuntimeInitialized() {
        console.log('OpenCV.js is ready.');
      }
    };

    const handleClick = () => {
      const canvasInput = document.querySelector('img');
      const canvasOutput = document.querySelector('canvas');

      let src = cv.imread(canvasInput);
      let dst = new cv.Mat();

      cv.cvtColor(src, dst, cv.COLOR_RGBA2GRAY);
      cv.imshow(canvasOutput, dst);

      src.delete();
      dst.delete();
    }
  </script>
</body>
</html>
결과

Threshold
https://docs.opencv.org/3.4/d7/dd0/tutorial_js_thresholding.html
OpenCV: Image Thresholding
Goal In this tutorial, you will learn Simple thresholding, Adaptive thresholding, Otsu's thresholding etc. You will learn these functions : cv.threshold, cv.adaptiveThreshold etc. Simple Thresholding Here, the matter is straight forward. If pixel value is
docs.opencv.org
다음은 이진화 하는 방법인데 위 링크의 예시대로 해도 되지만
grayscale 작업을 거친 후 그에 대한 결과물로 thresholding 처리 하는 것을 추천한다.
그리고 여러 thresholding type이 있지만
아무래도 임계값을 알아서 찾아 세팅해주는 OTSU type을 사용하는게 제일 무난하지 않을까 싶다.
코드
const handleClick = () => {
  const canvasInput = document.querySelector('img');
  const canvasOutput = document.querySelector('canvas');

  let src = cv.imread(canvasInput);
  let dst = new cv.Mat();

  cv.cvtColor(src, dst, cv.COLOR_RGBA2GRAY);
  // cv.threshold(src, dst, 177, 200, cv.THRESH_BINARY);
  cv.threshold(dst, dst, 177, 200, cv.THRESH_OTSU);  // OTSU로 변경
  cv.imshow(canvasOutput, dst);

  src.delete();
  dst.delete();
}
위 전체 코드에서 handleClick만 살짝 수정했으니 헷갈리지 않도록
보면 grayscale하는 코드에서 threshold 함수만 추가됐다.
다만, 예시 코드와 달리 src가 아니라 dst로 변경되어 있는데
grayscale한 결과가 dst에 담겨 있기 때문에 dst를 thresholding한 후 다시 dst에 담고 있는 코드라고 보면 된다.
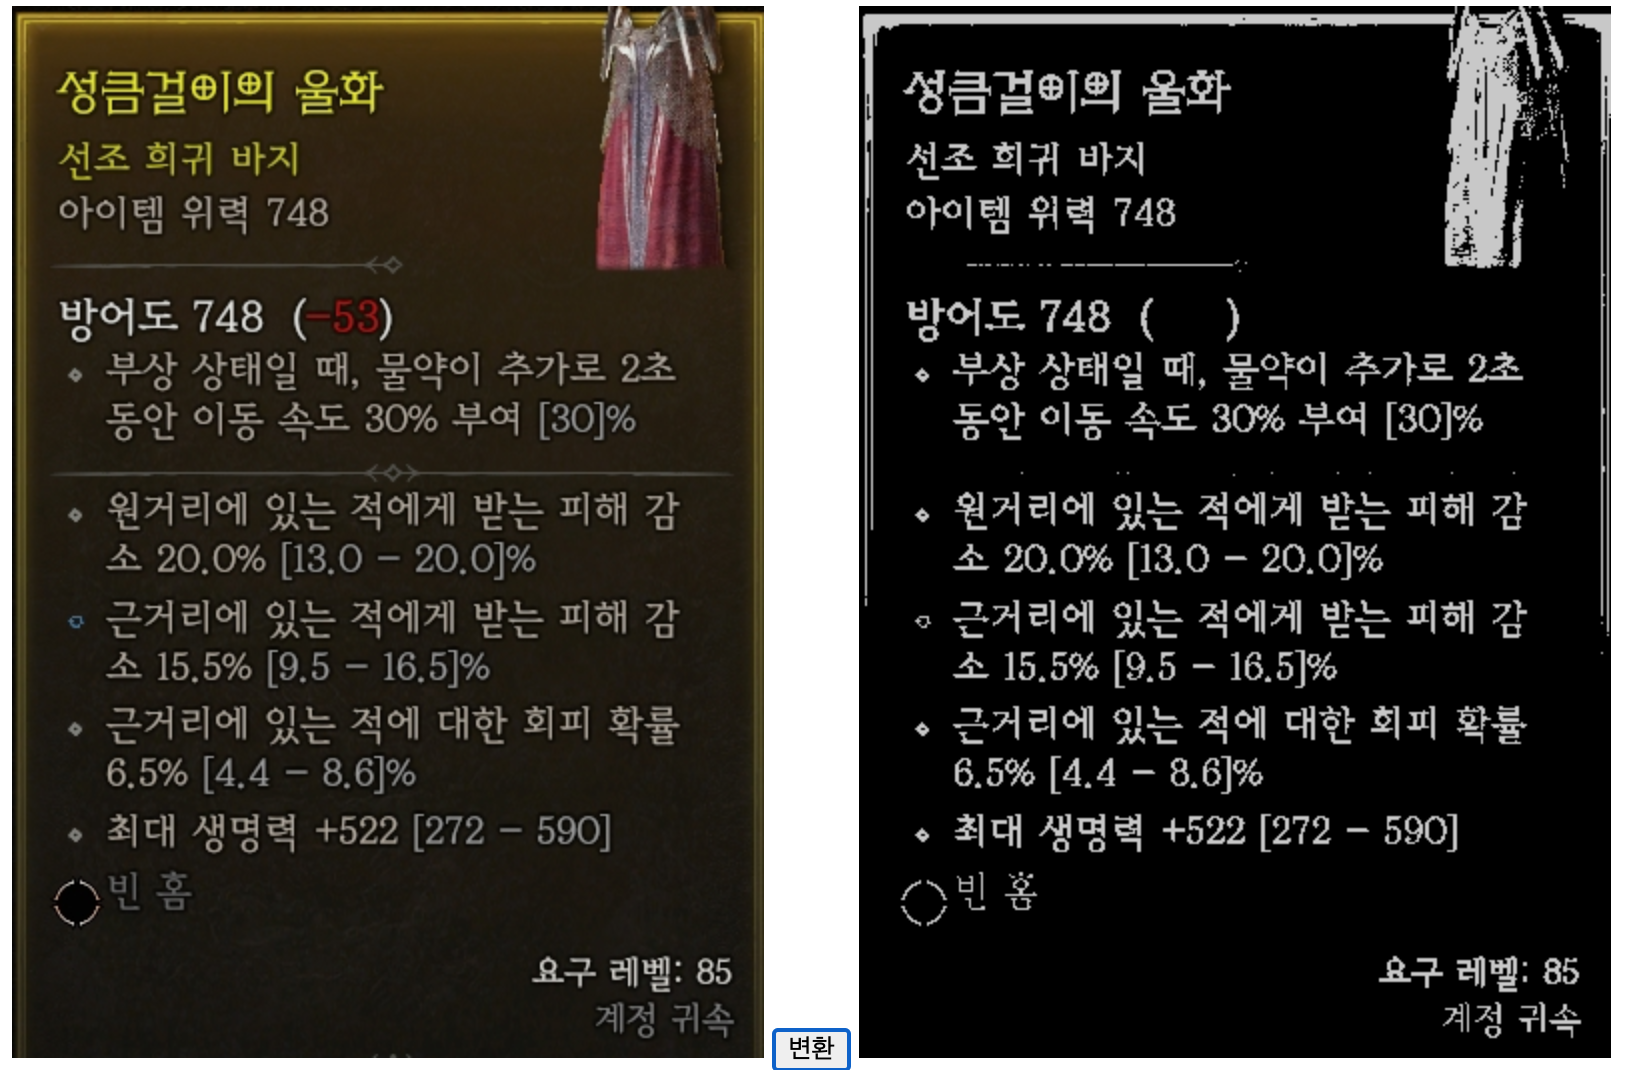
결과

상당히 알아보기 힘들지만 이진화는 보통 텍스트를 구하기 위해 사용하는 방법이니
텍스트가 있는 이미지에서 효과적으로 작동한다.

'JavaScript' 카테고리의 다른 글
| [NestJS] How can I respond with a file and delete with interceptor (1) | 2024.02.27 |
|---|---|
| Onclick vs. AddEventListener, 버블링, 캡쳐링 (0) | 2023.07.17 |
| Tesseract.js - (OCR) 이미지 텍스트 인식 라이브러리 (0) | 2023.07.09 |
| Cropper.js - 이미지 자르기 라이브러리 (0) | 2023.07.09 |
| [Vue 3.0] data()와 methods() 대신 setup() 사용하기 (0) | 2023.06.21 |


