
| 일 | 월 | 화 | 수 | 목 | 금 | 토 |
|---|---|---|---|---|---|---|
| 1 | 2 | 3 | ||||
| 4 | 5 | 6 | 7 | 8 | 9 | 10 |
| 11 | 12 | 13 | 14 | 15 | 16 | 17 |
| 18 | 19 | 20 | 21 | 22 | 23 | 24 |
| 25 | 26 | 27 | 28 | 29 | 30 | 31 |
- jest
- AWS
- flask
- TypeScript
- dfs
- typeORM
- GIT
- OCR
- react
- mongoose
- Sequelize
- 정렬
- Dinosaur
- 게임
- Bull
- JavaScript
- game
- Express
- cookie
- nodejs
- 자료구조
- Nest.js
- class
- MySQL
- Python
- Queue
- MongoDB
- 공룡게임
- nestjs
- Today
- Total
포시코딩
Integrate Bitbucket & Jenkins 본문
https://medium.com/@mustafaburakaydiin/integrate-bitbucket-jenkins-58f383f70ead
Integrate Bitbucket & Jenkins
The situation we will discuss in this article is the automatic update and recompilation of your project on the server when you push changes…
medium.com
Github가 익숙하다면 아래 링크에서 연습 후 하면 이해가 빠를것이다.
https://velog.io/@doyuni/Jenkins-NAVER-Cloud-Platform-Docker로-CICD-무중단-배포-환경-구축하기-1편-khk4w6hrm0
Jenkins, NAVER Cloud Platform, Docker로 CI/CD 무중단 배포 환경 구축하기 - 1편
이번 내용은 필자가 프로젝트를 진행하면서 처음으로 DevOps를 맡으면서 꼭 공유 하겠다고 마음 먹고 작성하였다. CI/CD란? CI(Continuous Integration) 지속적인 통합을 의미한다. 이는 개발자를 위한 자
velog.io
To explain these steps more clearly, I will break them down into 9 sections and demonstrate them step by step.
- Creating a Webhook on Bitbucket
- Creating Bitbucket password
- Creating SSH Key
- Jenkins installation with Docker
- Jenkins Plugins
- Creating Jenkins Global Credentials
- Jenkins Configuration
- SSH Servers
- Creating Jenkins Project
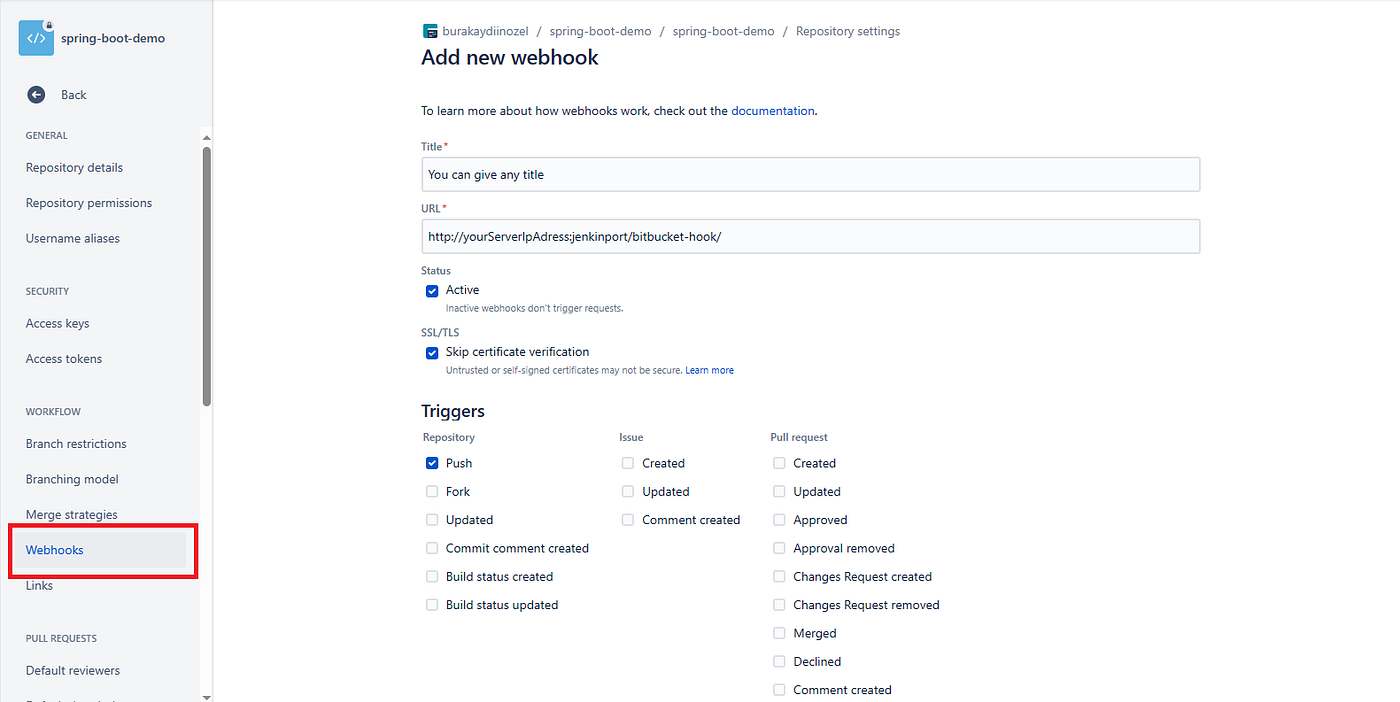
1. Creating a Webhook Bitbucket
After creating the repository, when you go to the Repository / Webhooks section, you create a webhook as follows.
Title : You can give any title (exp: jenkins-webhook)
URL : http://JenkinsServerIpAdress:jenkinsPort/bitbucket-hook/
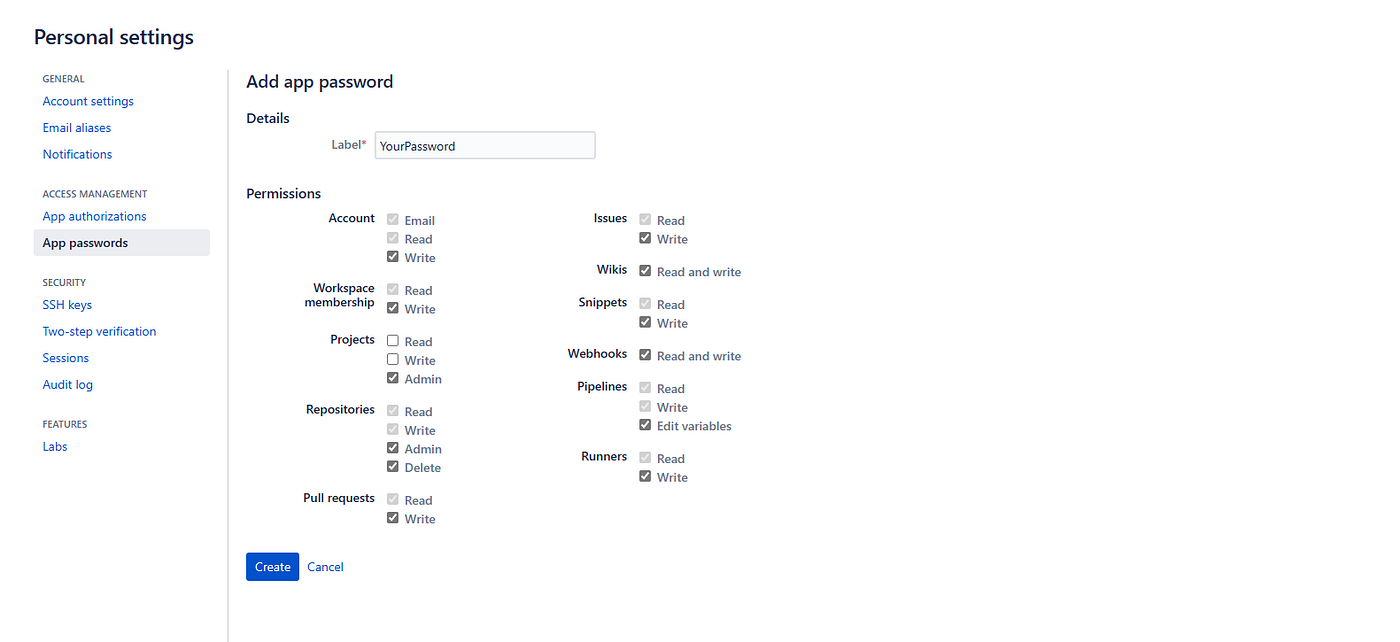
2. Creating a Password on Bitbucket
We create a password to access the private repository. To do this, navigate to Personal Bitbucket Settings / App passwords.
3. Creating SSH Key
We need to connect to our server where our projects will run via SSH as the root user. If you don’t know how to connect as root, you can follow the steps in this link to complete your configurations.
We are creating SSH keys.
ssh-keygen -t rsa -b 2048We navigate to the directory where our SSH keys are generated.
cd /root/.sshCopy the SSH key we created into the authorized_keys file.
cat id_rsa.pub > authorized_keysView and save your public key as shown below. We will use it when configuring the server on Jenkins.
cat id_rsa4. Jenkins installation with Docker
Make sure Docker Engine is installed on your server, and then run this command.
docker run -p 8080:8080 -p 50000:50000 --restart=on-failure -v jenkins_home:/var/jenkins_home jenkins/jenkins:lts-jdk17Once Jenkins starts running, you will see a password in the console. Log in with that password and complete the custom installation.
5. Jenkins Plugins
To install the required plugins for Bitbucket and server configurations, go to Dashboard/Manage Jenkins/Plugins/Available plugins/ and add the following plugins.
- Bitbucket
- SSH Server
- SSH Plugin
- SSH Credentials Plugin
- SSH Build Agents Plugin
- Publish Over SSH
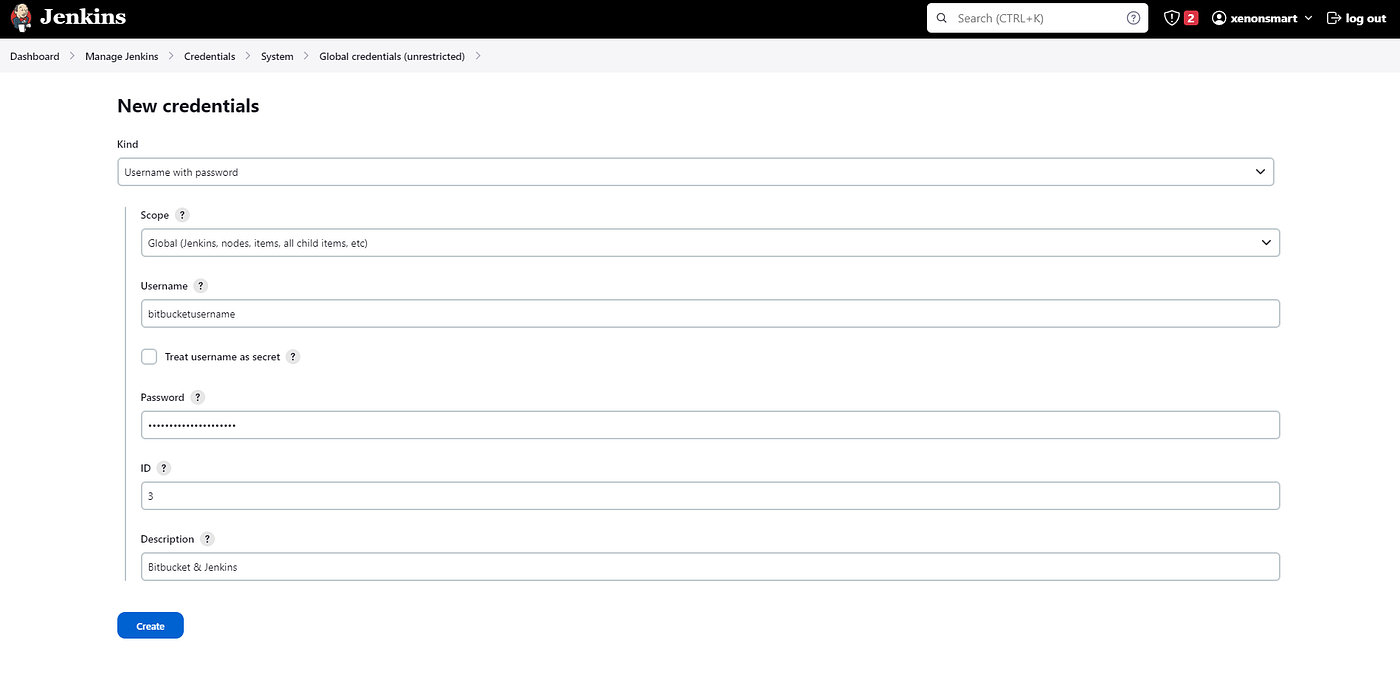
6. Creating Jenkins Global Credentials
Navigate to Dashboard / Manage Jenkins / Credentials / System / Global credentials (unrestricted) and create credentials.
- Username : Bitbucket Username
- Password: In the second step, enter the password you created on Bitbucket.
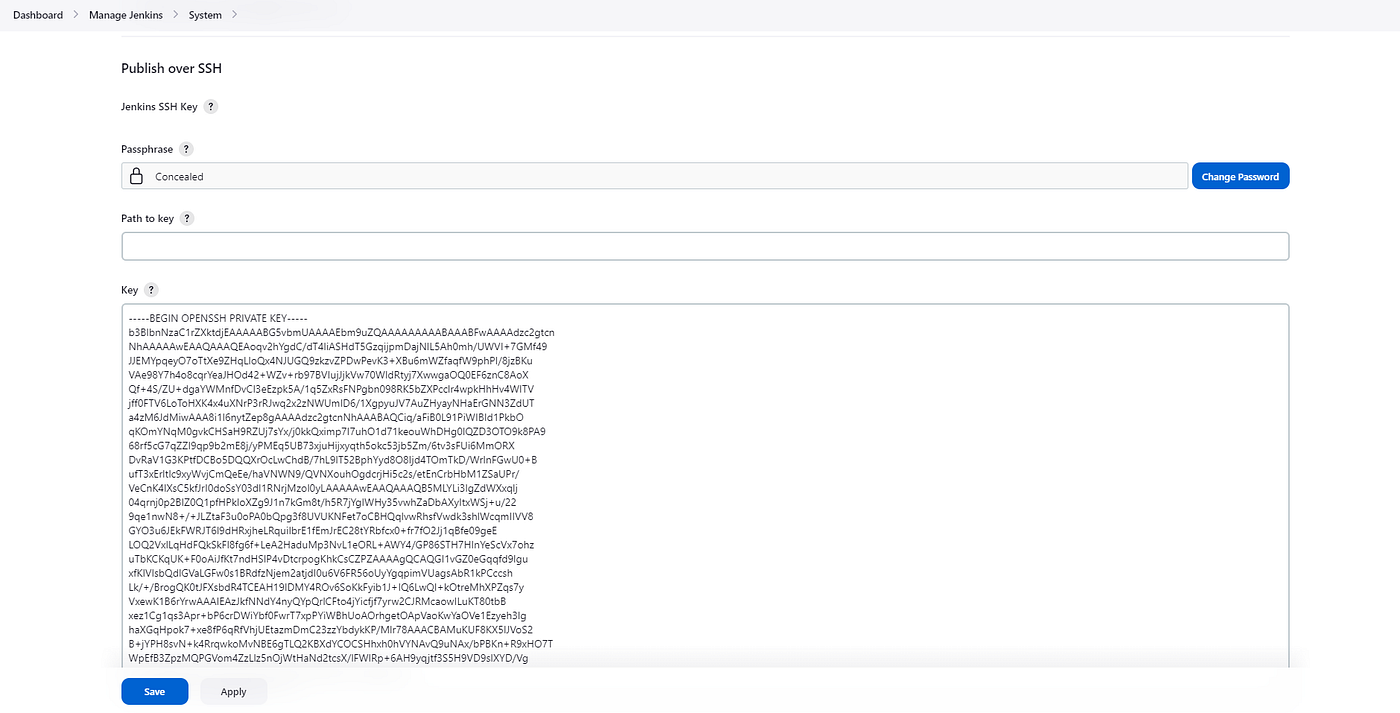
7. Jenkins Configuration
Go to Dashboard / Manage Jenkins / System,
Key: In the third step, write the key from the id_rsa you created.
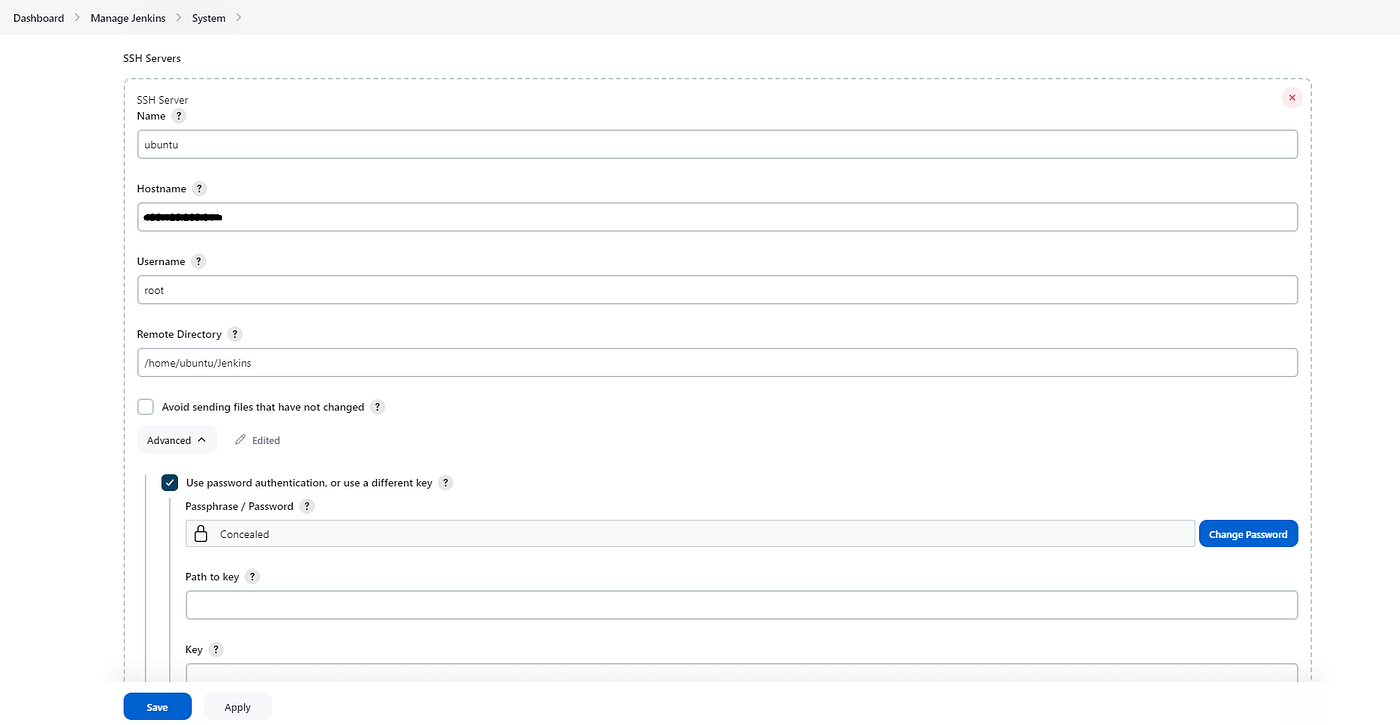
8. SSH Servers ;
Name: ServerName.
Hostname: Server Ip Adress.
Username: SSH connection username (root).
Remote Directory: The file directory where the files in the Bitbucket Repo are copied.
Afterward, click on the Advanced option and go to the Use password authentication, or use a different key section:
Passphrase / Password: Enter the SSH connection password.
9. Creating Jenkins Project
First, we are creating a Jenkins project Dashboard / New Item / Freestyle Project
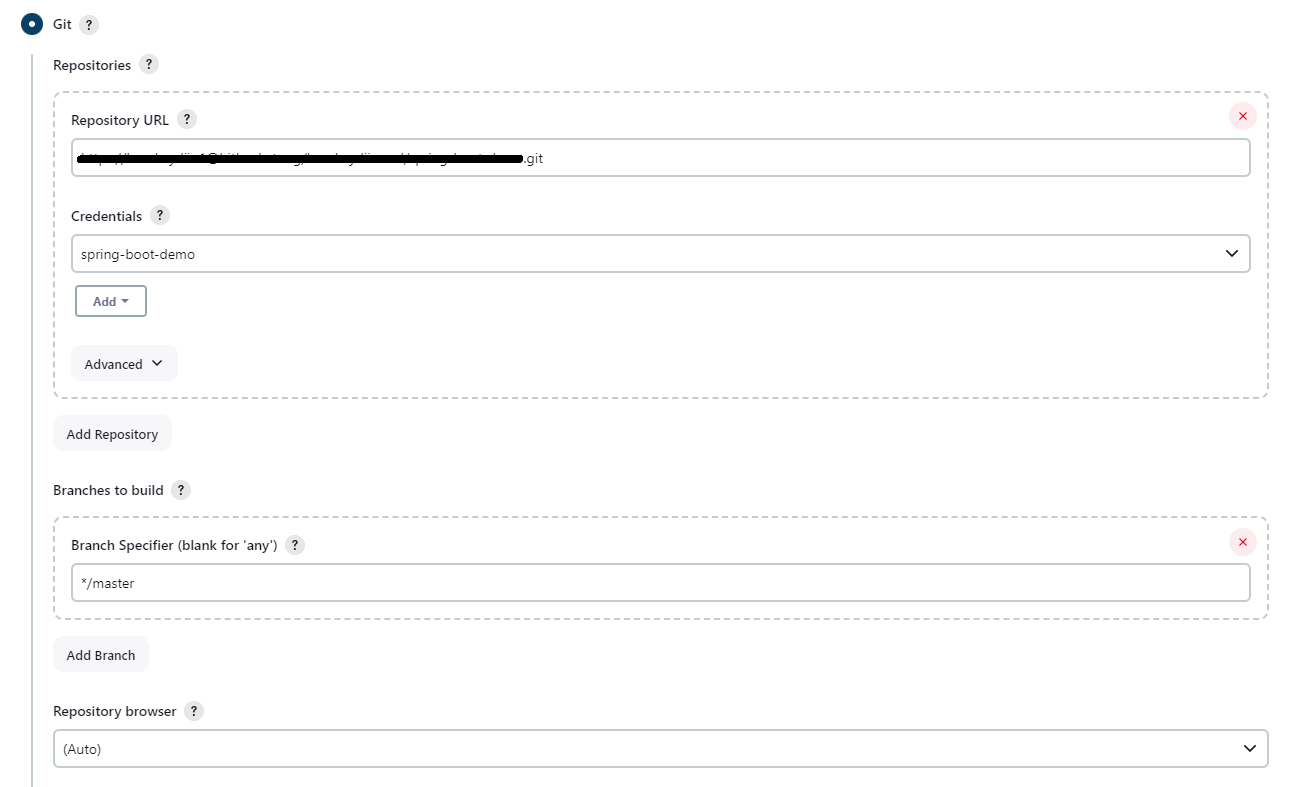
Next, click on the Git option under Source Code Management and fill it out as follows.
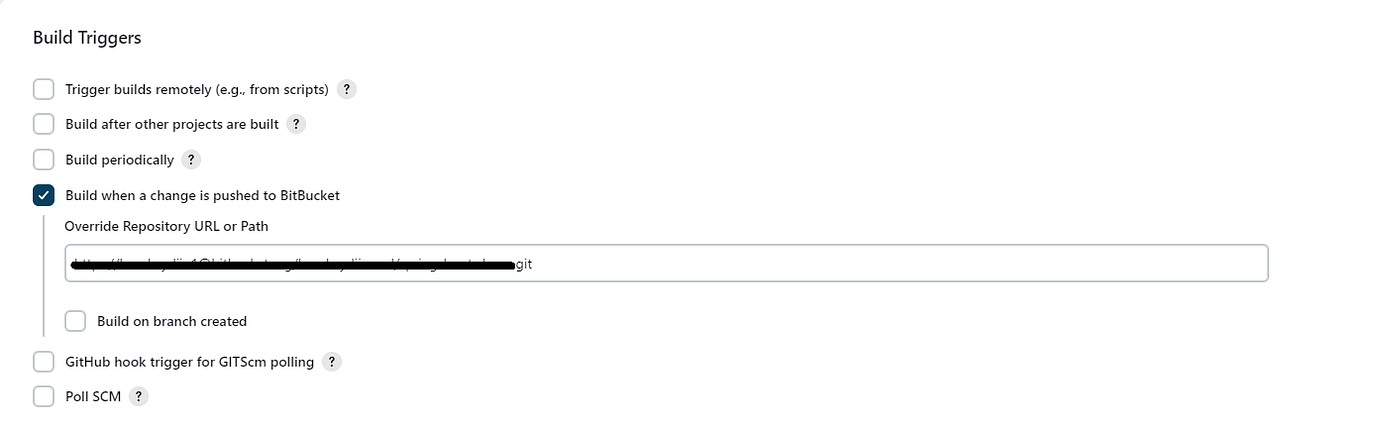
Under the Build Triggers tab, click on the option Build when a change is bushed to Bitbucket and provide the .git extension link of your repository.
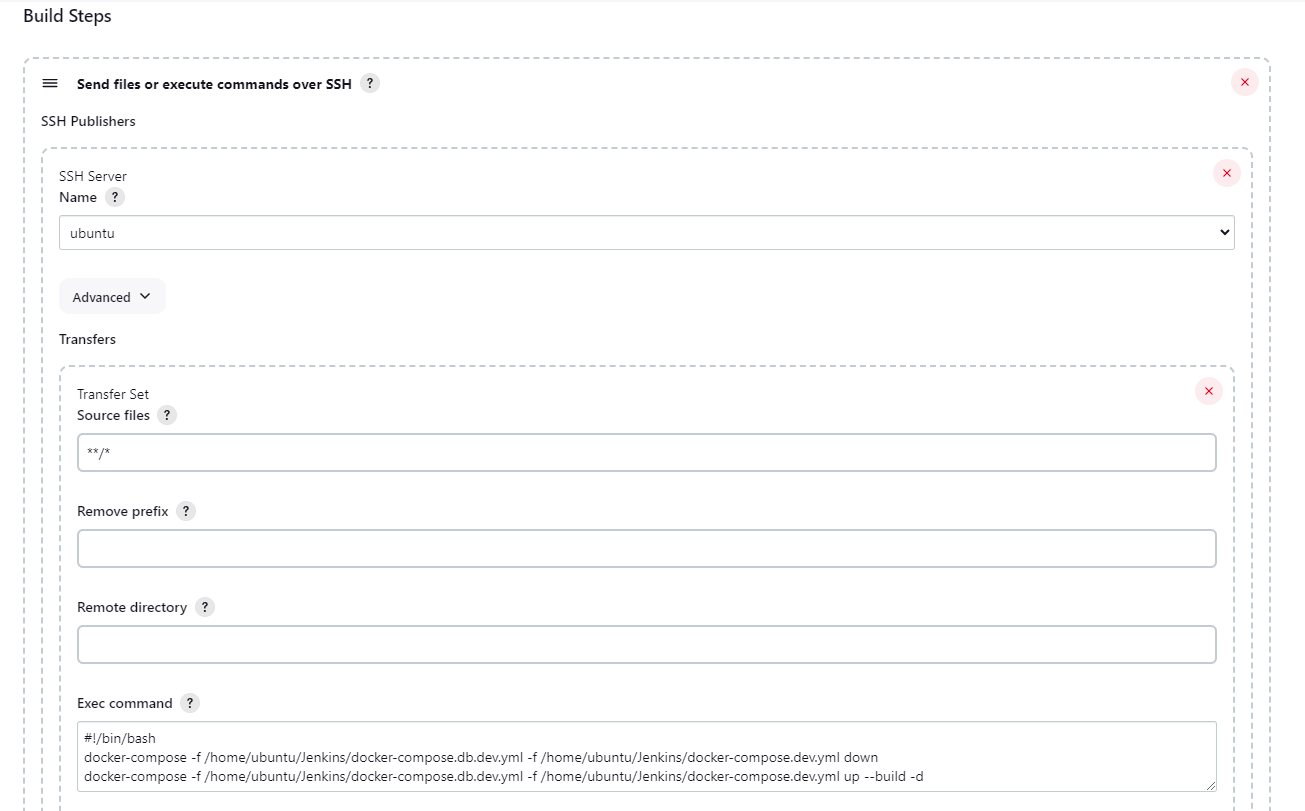
In the Build Stepssection, select the option Send files or execute commands over SSHand complete your configurations.
Name: In step 8, select the name of the SSH server you created.
Source Files: To retrieve all files in the repository, use the ‘**/*’ command.
Exec Command: You can run any Bash script you want.
Attention: Don’t forget to include #!/bin/bash at the beginning to execute a Bash script.
After saving, when you commit and push to the designated branch, your repository will be updated on the server and will run along with the specified Bash command.